Mastering the pre-purchase inspection is the ultimate rite of passage for Airstream owners. It’s a major decision so it needs to be treated like a six-figure capital investment. I learned a ton with my first Airstream, a 2018 22’ Bambi, and applied those lessons when inspecting my 2022 27’ Globetrotter.
So, you have finally decided to pull the trigger on a silver bullet. You have the tow vehicle ready, the dream is alive, and you are staring at a listing for a “pristine” used unit that seems too good to pass up.
It is easy to get blinded by that polished aluminum and visions of cracking open a cold one next to an open fire. You walk onto a dealer lot, see those panoramic windows, and your brain starts picking out throw pillows instead of checking rivets or running a ‘burp” test.
The reality is that Airstreams are considered a top dog in the RV world, but even a late-model unit can have some hidden secrets. By the time you finish this post and download the checklist, you will be able to look past the glitz and see the actual health of the rig.
A Quick Heads-Up: This guide is designed to empower you with the same tactics I used to evaluate my own purchase, but it is for educational purposes only. Buying a used Airstream is a major investment that requires your own best judgment. While the downloadable checklist helps you spot obvious red flags, it is not a substitute for a professional RV inspection. Use this resource at your own risk. When in doubt, always hire a certified pro to protect your investment.
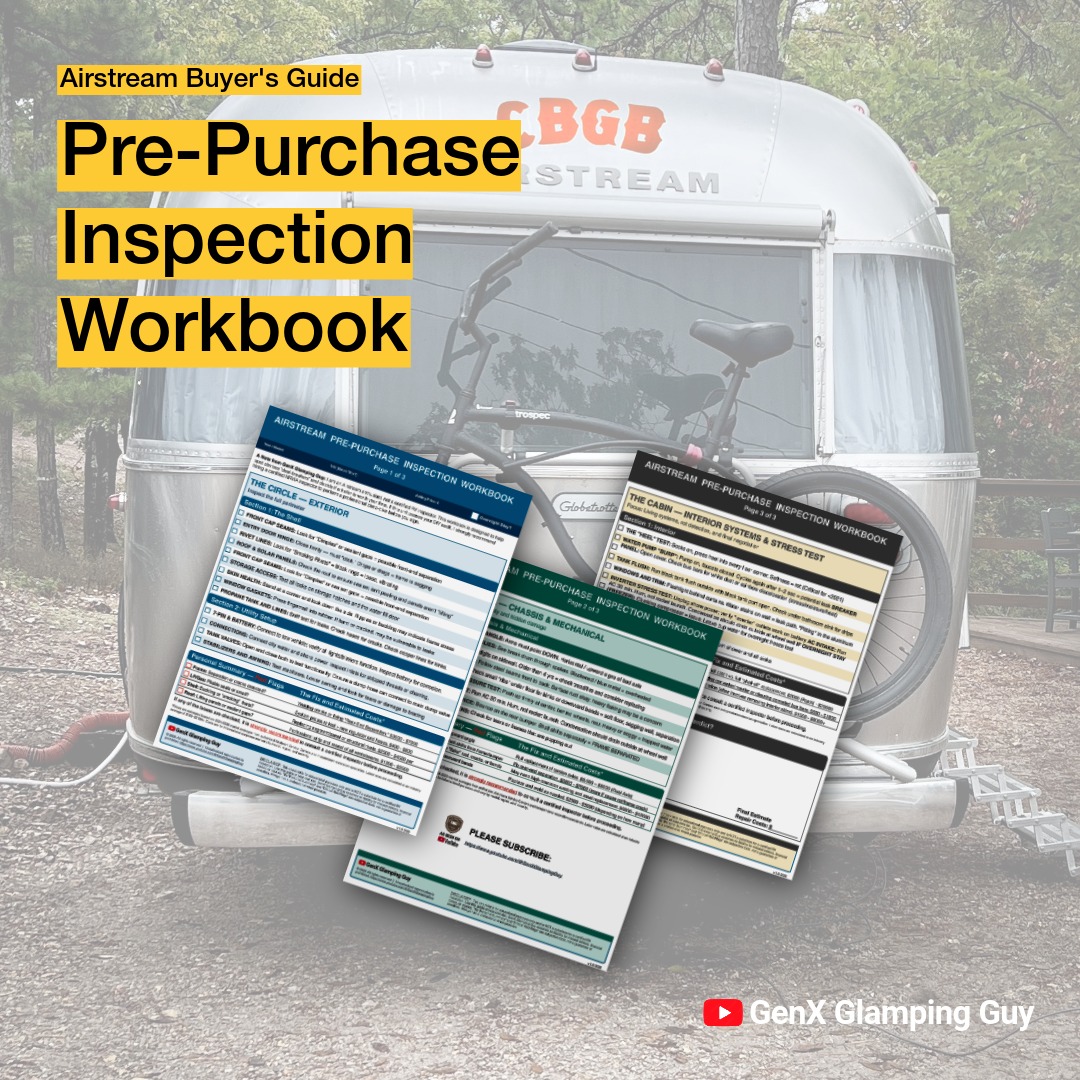
Free Download: The Pre-Inspection Workbook
The “60-Second Rule”: Evaluating a Dealer Lot
Before you even crack the door, you can conduct a “sidewalk audit.”
Start with the profile view. Look at the space between the top of the tire and the wheel well. If the trailer looks like it is “squatting” or the tires are buried deep in the well, those Dexter Torsion Axles might have lost their spring. That is a potential $5,000 repair right out of the gate.
Next, scan the seams for the “Silicone Smear.” If you see thick, goopy clear or white silicone around the windows, it is a sign of an amateur leak repair. Real craftsmanship requires aircraft-grade sealants, not a hardware store squeeze tube.
Keep an eye out for black “weeping” streaks coming from the rivets. These streaks are oxidation telling you that water may be active behind the skin. If you see “spider-web” filiform corrosion or rivets that look like they have been replaced with “olympic” pop-rivets, the trailer may have a history of moisture entry. Filiform corrosion is white, branching, thread-like squiggles that look like a spider web or a tiny white worm crawling under the surface of the aluminum’s clear coat. Olympic rivets often have a tiny “dimple” or a visible circle in the center where the mandrel was broken off.
Finally, look at the gap around the entry door. It should be perfectly uniform. If the door hangs crooked or requires a “lift and shove” to latch, the frame may be sagging or twisted.
With input from many Airstream owners, I created the Airstream Pre-Purchase Inspection Workbook to help identify expensive ‘deal-breakers’ before you buy. The 3-page guide includes a breakdown of common red flags and current 2024–2026 repair estimates to help you evaluate the true cost of your investment. I hope it helps.
The 5 Inspection Mistakes That Cost Buyers Thousands
1. The $7,000 “Bumper Bounce” (Structural Separation)
The biggest mistake is assuming the shell and the frame are still one happy unit. Over time, the “sandwich” that holds them together can fail, leading to Rear End Separation.
How to Evaluate: Stand on the rear bumper and give it some rhythmic weight.
The Red Flag: If the bumper moves independently of the aluminum shell, the connection is gone. While you are at the front, look for “puckering” or dimples in the metal above the propane tanks. This signals potential Front-End Separation (FES). It’s easily fixable but you want to make sure it’s addressed.
2. Dexter Axle Health (The $5,000 Suspension Audit)
Airstreams do not use traditional leaf springs. They rely on rubber rods that can “freeze” over time, turning your trailer into a rolling earthquake on the highway.
How to Evaluate: Perform the “Down-Angle Audit.” Look behind the tire at the torsion swing arm.
The Red Flag: The arm should point toward the ground. If it is parallel or, worse, pointing up toward the floor, the suspension could be a goner. Check the tires for “cupping” wear, which is a sign the trailer is bouncing down the road without any shock absorption. If the unit has Nev-R-Lube bearings, ensure there is no grease spray on the inside of the wheel.
3. Subfloor Rot (The $20,000 “Heel Test”)
Do not let a beautiful floor fool you. Plywood subflooring used for many pre-2021 models may have water damage worth investigating. Many newer Airstreams transitioned to Composite Flooring (such as Transhield or Coosa style). This material is designed to handle moisture better than traditional plywood.
How to Evaluate: The Perimeter Pressure Test. Ditch your shoes. Walk the edges of every wall in your socks and put your full weight into your heels. If you can’t reach corners like in my 2022 Globetrotter, test where water gravity-feeds from the shell to the floor. Hot spots might include the front door threshold where the flooring meets the metal door frame, the, inside the exterior, the wheel well humps, or anywhere else you can dig your heels.
The Red Flag: If the floor feels soft, “crunchy,” or has a hollow give, you may be looking at rot. If you are serious, use a pinless moisture meter along the baseboards. Anything over 20% indicates an active leak. Remember, post-2021 Composite Flooring is the gold standard, but for older models, the heel test is non-negotiable.
4. The “Soggy Diaper” (Belly Pan & Outriggers)
You cannot inspect an Airstream only from a standing position. You have to get on the ground and look at the foundation.
How to Evaluate: Reach under and push upward on the aluminum belly pan.
The Red Flag: If the pan feels heavy, sloshy, or bulged out, it may be holding water. This is the “soggy diaper” effect that rots steel frames from the inside out. Inspect the outriggers (the small ribs supporting the shell). If they are kinked or rusted to a “flake,” the shell may be losing its support.
5. The “Rainbow” Electrical Risk & Plumbing Burps
Most buyers check if the microwave turns on and leave it at that. You need to look for signs of systemic stress.
How to Evaluate: Electric: Pop the cover on the breaker panel and shine a light on the copper bus bars. Plumbing: Turn on the water pump with the fresh tank full and all faucets closed.
The Red Flag: If the copper bars have a blue or purple “rainbow” discoloration, the electrical system may have been hammered by heat or a failing Inverter. If the water pump “burps” or cycles every few minutes, you may have a high-pressure leak in the PEX plumbing hidden in a wall or under the floor.
The 10-Minute “Walkaway” Test
If you encounter a combination of these Red Flags, you are looking at a project, not a turn-key glamping rig:
- Spongy floor sections (especially near the door or rear).
- Torsion arms pointing upward (frozen suspension).
- Moisture meter spikes (>20%).
- Heavy “flake” rust on the main chassis rails.
- Signs of major electrical overheating.
Strategic Buying Tip: Timing the Market
I’m guilty of buying during the “Spring Surge” when everyone is caught up in camping fever. However, the smartest buys happen in the late Fall. When owners realize they have to pay for winter storage or deal with winterization, their “firm” price starts to soften. If you can, wait until the last day of the month or the last day of a quarter to negotiate the final purchase price. Those days are top of mind for sales teams and managers looking to make their quota.
Go prepared. Bring your flashlight, your moisture meter, a ladder, and the most important tool in your arsenal: the Airstream Pre-Purchase Inspection Workbook.
Free Download: Used Airstream Pre-Inspection Workbook
Conclusion: Emotion Buys Trailers. Inspection Buys Freedom.
The goal isn’t to find a trailer that is “perfect.” The goal is to make sure you aren’t paying “perfect” prices for a unit that needs $15,000 in hidden repairs. When you approach a purchase with a clinical eye, you trade the anxiety of the unknown for the confidence of a pro. You aren’t just buying a camper; you are securing your future adventures.
Grab the workbook, put it on a clipboard, and stick to the process. If you have any concerns, I highly recommend you hire a certified inspector as my experience is that of a passionate but uncertified Airstream owner and enthusiast.
Before you know it, you will be the one relaxing in the shade of your awning, watching the next buyer make the same mistakes you were smart enough to avoid.
Glamp on!
Frequently Asked Questions About Airstream Inspections
Q. If the trailer has “Composite Flooring” (post-2021), do I still need to worry about the “Soggy Diaper” belly pan test?
Yes. While composite flooring won’t rot like plywood, a “soggy diaper” (water trapped in the belly pan) still poses a major risk to the steel chassis. Constant moisture against the frame rails leads to “flaking” structural rust and can corrode the wiring harnesses and plumbing lines tucked inside the underbelly. Even if the floor is bulletproof, the frame is not.
Q. I see “Smoking Rivets” on a trailer that looks otherwise perfect. Is that a deal-breaker?
Not necessarily, but it’s a sign of stress. A “smoking” rivet (one with a black oxidation ring) means the rivet is loose and vibrating in its hole. If you see just one or two, they can be replaced. If you see a long “stitch” of them along a structural rib, it means the trailer is experiencing significant “road flex” or the axles are so stiff they are hammering the shell apart.
Q. Does a “Propane Sniff Test” really work, or do I need specialized equipment?
A sniff test is a great “60-second rule” tactic, but for a real DIY audit, bring a small spray bottle of soapy water. Spray the regulators and the brass fittings behind the propane tanks. If you see growing bubbles, you have an active leak. Also, check the date on the tanks; propane tanks must be recertified every 10 years, and a dealer should have this done before you buy.
Q. How do I tell the difference between “Surface Rust” and “Structural Flaking” on the frame?
Surface rust is purely cosmetic. It looks like a reddish-brown dust but the metal underneath is smooth. “Flaking” or delamination looks like the metal is “growing” or peeling off in layers (similar to a flaky biscuit). If you can poke a screwdriver through any part of the outriggers or the main rail, or if large flakes of metal fall off when you tap it, the structural integrity is compromised.
Q. What is the “E1” code I keep hearing about during the water heater test?
The E1 code is a common fault on modern tankless water heaters (like the Girard units). It usually signifies a “Flame Out” or failure to ignite. When testing, make sure the propane is fully purged and flowing. If the code persists, it could be a faulty motherboard or a clogged gas orifice, a repair that ranges from $200 to $600.
Q. If I find issues, should I ask the seller to fix them or ask for a price reduction?
In the current 2024–2026 market, it is almost always better to ask for a price reduction. Unless the seller is taking it to a certified Airstream Service Center, “seller repairs” are often quick fixes (like the “Silicone Smear” mentioned in the guide). Use the estimated repair costs in the Workbook to justify a lower offer and then have the work done by a professional you trust.
Q. Can I perform these tests on a brand-new Airstream at a dealership?
Absolutely. In fact, you should. “Delivery defects” are common. Perform the “Heel Test” and the “60-Second Rule” even on a 2026 model. Finding a misaligned door or a leaking plumbing “burp” before you sign the papers ensures the dealer fixes it under warranty before you ever leave the lot.
Q. When is the best time of year to buy a used Airstream?
The smartest buys happen in late Fall and early Winter (October–January). According to industry data from Progressive Insurance and Thor (owners of Airstream), demand drops significantly as the camping season ends. Sellers often lower prices to avoid winter storage fees or the hassle of winterization. If you can, wait until the final day of a month or quarter to negotiate, as dealers are often highly motivated to meet sales quotas.
Q. What are the most common areas where an Airstream will leak?
The highest-probability leak points are the clearance/marker lights, roof vents, and the rear window. Marker lights rely on thin gaskets that dry out, while roof accessories (antennas/solar ports) are often sealed with inferior silicone. Always check the interior cabinets directly below these points; brown streaks or a “musty” smell in the upper storage lockers are the first signs that water is moving behind the aluminum skin.
Q. How do I inspect the tires for “cupping” or alignment issues?
Run your hand across the tread. If it feels smooth one way but sharp the other, that’s “feathering” from a bad alignment. If you feel “dips” or “valleys” every few inches, that’s “cupping,” which signals worn shocks or unbalanced tires. Also, check for “One-Sided Wear”, if only the inside edge is worn, you likely have a bent axle or a camber issue. Don’t forget the “Penny Test” to ensure tread depth is above 2/32″.
Q. How can I check for floor rot if the corners are hidden by furniture?
Focus on gravity-fed paths. Use your heel at the entry door threshold, around the toilet base, and along the wheel well humps. If you can’t reach a corner, use a flashlight to look for “bubbling” or “wavy” vinyl flooring, which indicates the plywood underneath has swelled. You can also open exterior storage hatches and poke the exposed subfloor with a flathead screwdriver. If it sinks in like butter, the wood is rotted.
Q. Why is the “Water Pump Burp Test” so important for buyers?
The pump acts as a heart monitor for the trailer’s plumbing. If the pump “burps” (kicks on for a second) while all faucets are closed, it means the system is losing pressure. This reveals “invisible” leaks in PEX lines hidden behind walls or inside the belly pan. It also identifies a failing check valve. Catching this early prevents the “Soggy Diaper” effect, where trapped water rots the steel frame and subfloor without ever hitting the ground.
Q. Which sealants should I see on a well-maintained trailer?
Look for silver Acryl-R on the roof seams and gray AdSeal around the windows and doors. High-quality maintenance usually involves Sikaflex 221 (Black) for underbelly repairs. If you see thick, goopy blobs of white hardware-store silicone, it’s a red flag. Silicone doesn’t bond well to aluminum over time and is a sign of an amateur “patch job” rather than a professional, aircraft-grade repair.
Q. How do I tell a factory rivet from an “Olympic” repair rivet?
Factory rivets are perfectly smooth, solid domes. Olympic rivets have a tiny “dimple” or pinhole in the center where the mandrel was shaved off. Seeing a row of Olympics isn’t a deal-breaker. It often means a structural weakness like Front-End Separation has been professionally addressed. That said, it is a “forensic” tell. Use it to ask the seller for service records to ensure the work was done by a certified Airstream technician rather than a DIYer.
Q. How to Test for Airstream Rear End Separation (The Bumper Bounce)
The “Bumper Bounce” is the industry-standard DIY test to ensure an Airstream’s shell is still structurally bonded to its chassis. If these two components move independently, you are likely looking at a $7,000 to $12,000 repair.
Step-by-Step DIY Inspection Protocol:
Level the Trailer: Ensure the unit is parked on flat ground.
Retract Stabilizers: This is critical. You must test the trailer’s own structural integrity, not the support of the jacks.
The Bounce: Have one person stand on the rear bumper.
The Observation: A second person stands at the side, focusing on the horizontal seam where the aluminum body meets the rear frame. (Tip: Use a tripod to film this in slow-motion for a frame-by-frame analysis).
Evaluating the Results:
Solid Foundation: The bumper and the aluminum shell move together as a single, rigid unit.
Structural Separation: The rear bumper moves up and down while the shell remains stationary. If you see a widening gap or “independent movement” between the metal layers, the unit has Rear End Separation.Strategic Tip: If a seller refuses to let you perform this test, consider it a major red flag. A structurally sound Airstream should easily handle the weight of a person on the bumper.

You May Also Like:
- Learn Exactly How To Sanitize Airstream Fresh Water Tank
- The Smart Buyer’s Airstream Inspection Guide (Includes Free 3-Page Workbook)
- The $0 Airstream Cold-Weather Kit That Actually Works. And When You’ll Need More
- The Airstreamer Guide to a Perfect Campsite Setup and Tear Down (Plus Free Checklist)
- Best Walkie Talkies for Camping & RV Travel: A Real World Field Test in the Ozarks
Leave a Reply